Monday, May 29, 2006

Strawberry Fields, Forever


The first thing you have to understand is that it is never just about the berries. If you wanted nothing more than terrific strawberries, you would just call to reserve a few quarts and drive up to the orchard market after work one day and you'd get berries at least as good as the ones you would have picked. You'd pay more, certainly, but you wouldn't have been squatting or crawling in the damp straw, picking up stains that will never, ever come out.

Your own picking, fine though it may be, will not guarantee the perfect berry. You can be sure that they will be far better than what you get from the supermarket, but even if you pick the berry in that fleeting moment between under and overripe, there are too many factors beyond your control. Perhaps there was not enough sun this year. Perhaps the rain was first excessive and then insufficient. Perhaps they have a different variety now, but you can be about as certain as you are about anything that the berries aren't going to be quite as good as the ones from that year and that stand where you picked up a quart and bit into one and it tasted like wine, and the two of you went through the whole quart without even thinking about sugar or cream.

Picking berries is as much about the journey as it is about the result. That is why, on a late May morning, when I checked the orchard's website (no, it's really not like it was when you were growing up; at least not that part; in those days, someone would drive by the patch and ask the farmer whether the berries were ready and then the telephones would ring, and your mother would gather you and your siblings and your pots and pans and put everything in the car and off you'd go; and in those days, you didn't have to go very far: there were good patches all over the place) and see that the season is officially underway, I decided not to take the shortest and most reliable route. I don't pick berries every year, and because of the frequency with which the rural highways in this heavily suburban county get rearranged, I can't always tell you exactly where the orchard is. I could print out directions, or I could take the way that I know will get me there even if I don't have directions, but it's about the journey, so instead I just head off in the approximate right direction, and when it feels like I've gone far enough (maybe twenty minutes; maybe more), and I see a turn that looks like it will land me closer to where I want to be, I take it, and eventually, when my desire for the fields grows strong enough, I will see in the distance, rising like Brigadoon from the mists, a row of people bent over and filling their cardboard containers with berries. Another five minutes and four or five more turns brings me to the orchard, and an additional five minutes across gravel roads brings me to the field.

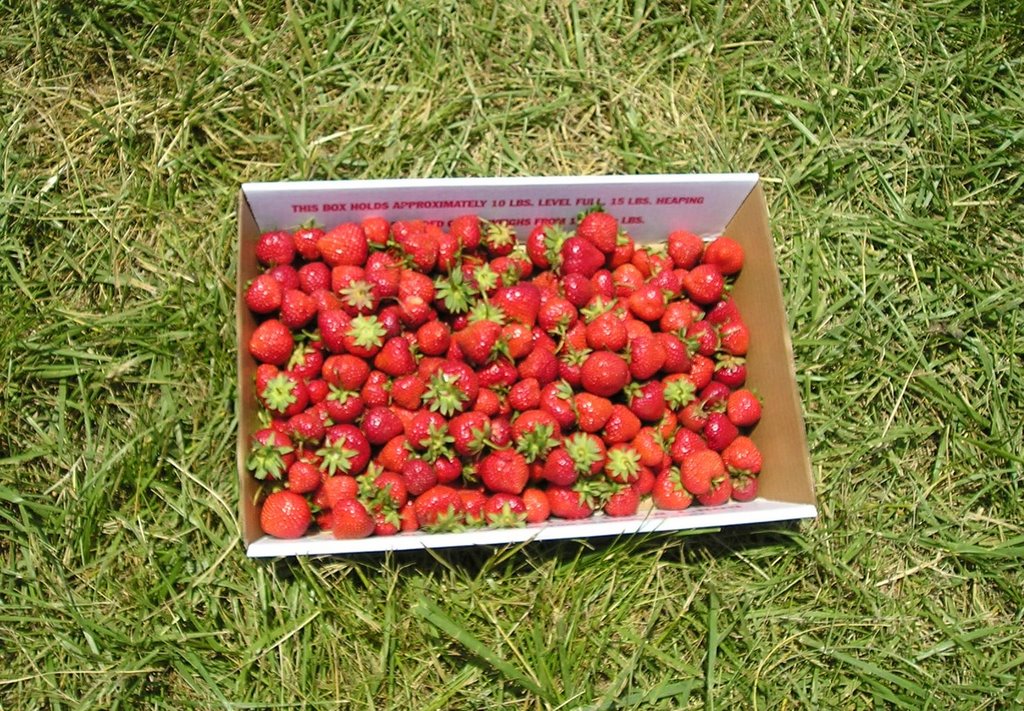
This part is the same as it was when I was growing up. People who otherwise may have very little in common all thrown together in a field doing the same thing, gathering food with their own hands. This morning, I ended up next to two people who were, I presume, in college and dating each other. At one point, the young man turned to me and said, "What are you going to do with your berries, sir?" It is with great difficulty that I hear anyone call me "sir" without laughing, but he was simply trying to be polite, and he probably couldn't help being half my age, so I told him what I had planned for my berries and inquired after his. He said that they planned to eat most of them as they were, but that they also intended to dip some in chocolate. I suggested that he might want, in that case, to consider leaving some of the stem on when he picked the berries, and he then asked me if I had some idea how to prepare the chocolate for dipping. I gave him a few pointers and told him where to find the nearest Trader Joe's to pick up some good chocolate at a reasonable price. I was gathering fewer berries than I have in past years, but the young couple was gathering fewer berries still, and there were two of them, so it was not long until they were bidding me a good day (sadly, there was another "sir"), and I was left alone with my thoughts and the berries. It was the first official day of the season, and the berries were generally neither as ripe nor as plentiful as one might hope, and the day was a good deal hotter than one might like, but certainly the only person who could watch his flat fill with red berries on a sunny day without feeling euphoric would be someone with too hard a hart to pick strawberries in the first place.

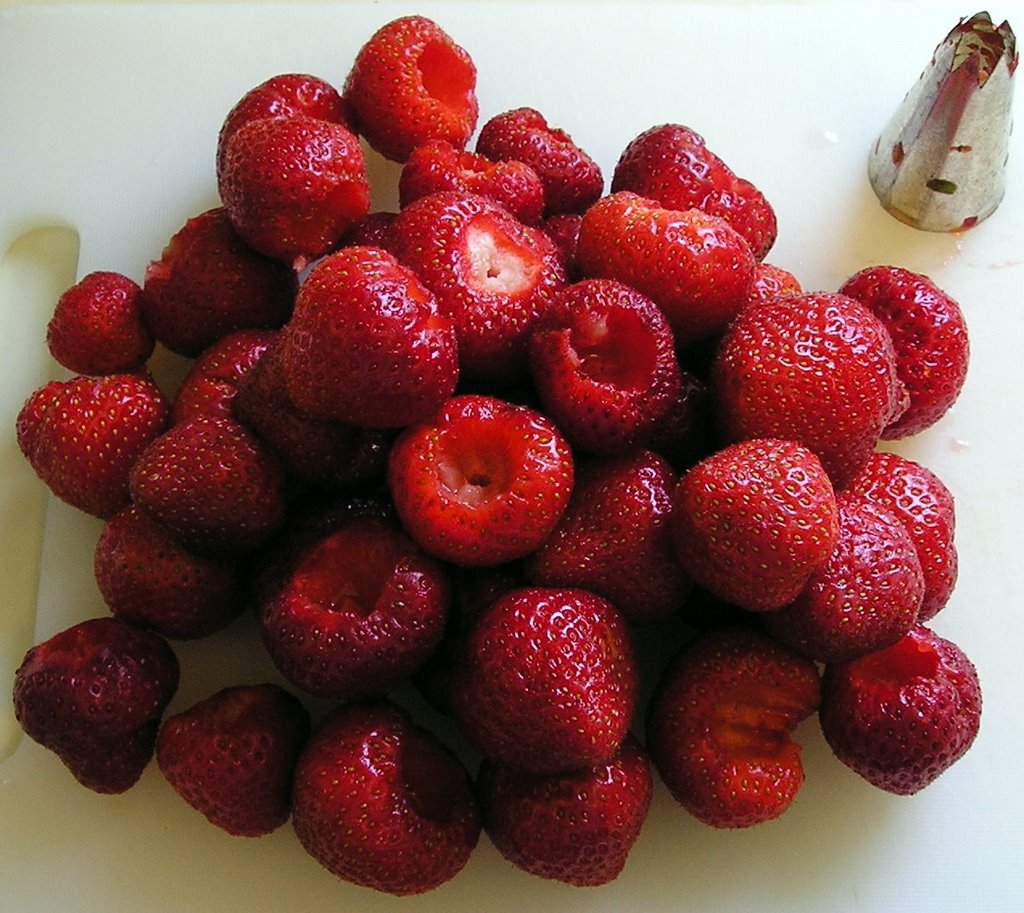
The journey is important, but you do end up with a quantity of berries and the knowledge that you can only get such berries for a few weeks a year, so you had better have a plan for dealing with them. I ended up with eight pounds of good, if not transcendent, strawberries, and I took them home (via a much more direct route, which I must remember for sour cherry season, which you really will miss if you blink) and got to work. Every use of strawberries that I know begins with hulling the berries. The always-reliable (if occasionally obsessive) Alton Brown avers that none of the several implements that are sold as strawberry hullers does a good job removing the hulls from strawberries. He recommends a star pastry tip. If memory serves, he recommends a #5 star pastry tip, but without undue searching, I could find only a #6 tip. It did seem a bit large on some of the smaller berries, but it did an admirable job of removing the hulls quickly and cleanly.

You could probably use up eight pounds of fresh berries, without preserving any, if you had a lot of people to feed, but I knew when I picked my berries that some of them were destined for the freezer. AB will also tell you that the best way to freeze strawberries is to use dry ice. Apparently, if you freeze whole berries (with the hulls removed) with dry ice, they will freeze solid so quickly that when they are slowly defrosted, they will retain the character of fresh berries. I'm sure that AB knows what he's talking about, but I don't do dry ice, and I've pretty much resigned myself to the fact that thawed strawberries are about flavor, not texture. So for about a quarter of my berries, I cut them into quarters, sprinkled them with sugar, let them macerate for a few hours in the refrigerator until they were very juicy, then I packed them into containers, covered the containers with plastic wrap, put on the lids, and plopped them into the freezer.

About half the berries are now being stored in the refrigerator. I used the clamshell container that the last strawberries I bought at Costco came in. I washed it and dried it first. I will probably make a pie Tuesday or Wednesday evening.

Another bunch of the strawberries got combined with red wine, sugar, and a little rosewater and made into a sorbet. Combining strawberries with red wine is another AB idea, but the sorbet is my recipe. You will have to understand that quantities are approximate. The amount of sugar you need depends entirely on the sweetness of your berries. My berries were a touch on the tart side, and I had to use a fair amount of sugar. I think that it is important to taste for sugar when the berry mixture is nice and cold. Your immersion blender will dissolve the sugar for you, even in cold liquid. The red wine you use is, of course, up to you, but something not too heavy is called for. When I conceived the recipe, I thought that a Chianti would be a good choice, and there happened to be a recently opened bottle of Chianti in the dining room, so I took some of that. I got my quantities of berries and wine by first slicing the berries into a four-cup measure and then adding wine up to the four-cup mark, but I'm certain that it was within a tablespoon or two of one-and-a-half cups.

Strawberry Sorbet

Strawberries, about one quart
1.5 cups red wine
Sugar
1 t. rosewater

Give your strawberries a brief rinse, then set them on paper towels to dry. Remove the hulls, and cut them into quarters (cut tiny ones in half; huge ones in eighths) and put them in a bowl. Pour the wine over the berries. Add half a cup of sugar, stir, and refrigerate for at least two hours.

With your immersion blender, puree the strawberry mixture. Taste it carefully and add as much sugar as you feel you need. Add the rosewater, stir well, and return to the refrigerator.

When the mixture is very cold, freeze it in your ice cream maker, following the manufacturer's directions. When done, pack it into a container, cover well, and freeze until solid.

I have never been a whiz with the ice cream machine. I understand that you are only freezing your ice cream or sorbet most of the way and then your regular freezer does the rest, but I am never sure how far to go. With this mixture in particular, I suspect that when I go back to the freezer, I will find it fairly solid, and I may have to scrape up the portions, like an Italian ice. [Late update: twenty-four hours later, the sorbet remains very scoopable. It tastes nicer, though, if you let it sit for a bit after you scoop it so that it is just starting to melt.] You could, of course, serve it as a slushie. I tasted the sorbet right after I turned the ice cream machine off, and it was all I could do to consign it to the freezer rather than eating it all on the spot. Seriously delicious: I do not think that a better strawberry sorbet recipe exists.

You might say, with some reason, that the sorbet could be made equally well with frozen strawberries. Frozen strawberries generally are, after all, frozen at the peak of ripeness. I hope that you're right about that, because it pains me to think that I could make this recipe for only three weeks during the year. I'm sure that I'll try it with thawed frozen berries at some point in the future.

Sunday, May 21, 2006

White TrashSoup Can Cooking

As it happens, I have impeccable white trash credentials, at least on one side of the family. I also, however, have some issues with the term "white trash," and I naturally don't want to offend any family members, so even though I'm very certain that none of my family reads this blog, I can't even tell you on which side my credentials lie.

Anyway, I had the best of intentions for cooking this weekend. A. was going on a retreat with a bunch of the other high schoolers from church, so I figured that I'd take L. with me to my parents' summer place, in Southwestern Pennsylvania, a mile across the Maryland border, in Somerset County. My parents, who are firmly ensconced in their seventies, have been having some health problems, and it is not certain that they will be making their way north at all this summer, but if it turns out that they're going to, I wanted to do a little bit of cleaning and make sure that the place was habitable so that neither they nor I would have to do it later. My parents claim that they won't just ignore their health problems and drive all the way from Florida to Pennsylvania, and they've promised me that if they decide to come north, they'll call me, and I'll fly down and drive them up over a weekend, but they have been known in the past to evince both stubbornness and a lack of judgment about these things. Last year, for example, they drove the entire 1,045 miles in a single day, leaving at something like 3 am and arriving at something like 9 pm.

Anyway, I figured that L. and I would drive up Friday evening, have some fun in the area on Saturday, and come back Sunday morning in time for V. and I to get to our 2:00 curtain for L'Italiana in Algeri (which, by the way, was fab) Sunday afternoon. And maybe, just maybe, I thought that it might be a good time to raid the grape arbor and make some dolmades. So maybe, just maybe, I researched some recipes and took a big bag of pine nuts up with me. That part of rural PA is not exactly a foodie's paradise, and while you can always find at least two brands of scrapple in the markets, pine nuts are not so common.

The best laid plans, well, you know how that goes. It's a good deal colder up there in the mountains where they are, and the lilacs, for example, which are gone here, are hitting their peak in my folks' front yard. The grapes, however, have set out not one leaf. I thought perhaps there was a problem, but there are plenty of other grape arbors in their neighborhood, and none of them have any leaves, either.

And then there was a small matter of a virus. I woke up Saturday morning feeling achey, and there were other symptoms that indicated that I wouldn't be getting a lot done that day. I did manage to make breakfast and then to hold myself together well enough to take L. to her favorite thrift store, where she scored a pair of jeans and three tops, and to purchase a cheap DVD player for my parents' den, but after we had lunch out and drove back to the house, I was pretty much done for. Fortunately, we still managed to have a pretty good time crashing on the couch and watching movies. I had brought Strictly Ballroom and Bringing Up Baby, neither of which L. had seen before and both of which she enjoyed. I think this was a good move on my part. I seem to have gotten L. early enough so that she hasn't developed unfortunate cinematic biases. A., by contrast, refuses on principle to watch any movie that's in black and white. Even The Philadelphia Story. No, really.

Eating was about the farthest thing from my mind, but L. was getting hungry, and it occurred to me that it might be a good idea for me to eat something relatively digestible: low in fat, high in carbohydrates and fiber. But I wasn't up to making a trip to the supermarket, so I had to scour the pantry. Fortunately, the first thing I found was a bag of lentils that I'd bought near the end of last summer. My mother doesn't like moving kitchen stuff, so she keeps a reasonable stock of equipment and spices in both places. Yes, I know, spices don't keep forever, but we were willing to make do. And what says "make do" more than using canned soup?

As you might guess, I wouldn't make this recipe if I had other options (like an onion, a carrot, and a hamhock), but it was surprisingly good. L. liked it a lot, and I found it digestible as well as tasty. And there aren't many recipes that are simpler. Mom had canned Cream of Chicken soup on hand, and that was fine. I think that perhaps Cream of Celery with a shot of Liquid Smoke would be an improvement, but I'm afraid that I'm not going to test that hypothesis. I have my doubts about either Cream of Cheddar or Cream of Asparagus, but I think that most soups of that sort would work. I have no idea how my mother came to have a pantry without Cream of Mushroom soup in it. The idea was so shocking that I figured that universe must have balanced it with something equally shocking somewhere else, but I could only think of one thing equally shocking, and when I got home, there wasn't any Cream of Mushroom soup in my pantry, so the universe must be balancing somewhere else. Perhaps Bakerina found a bread machine in her kitchen this morning.

Easy Lentil Soup

1 can Cream of Whatever soup
1.5 cans lentils
3 cans water
1 t. ground cumin
1/2 t. ground paprika
Ground pepper, to taste
Salt, to taste

Combine the first three ingredients in a saucepan. Stir. Bring to a boil. Add the cumin and paprika, and a healthy grinding of pepper. Reduce heat, cover, and simmer for thirty-five to forty minutes, stirring occasionally, until the lentils are tender. Adjust seasoning.

Wednesday, May 17, 2006

Strawberry Salad (It's a Dessert)

Much better than it looks.  Damn this flash!
I worked a bit late yesterday, and when I came home, I had a fairly meager dinner of leftovers, then I read for a while, then I came back to the kitchen and waited for inspiration. No, really.

I had good strawberries, I had decent bread, I had heavy cream, and I had the usual staples. I took about six inches of a wide baguette and cut it into fairly large dice. I melted about 1.5 tablespoons of salted butter in a nonstick skillet over medium-low heat, then I added about 1/4 cup of sugar and about a tablespoon of Grand Marnier. When the sugar had dissolved, and the mixture was bubbling (this only took a minute), I added the cubed bread and stirred it around to soak up most of the boiling syrup.

Keeping my eye on the skillet, and giving the bread a toss every couple of minutes, I hulled and sliced (fairly thickly) strawberries until I had about two cups. I added two tablespoons of sugar and let them macerate while I continued to cook the bread.

The bread took perhaps ten minutes to toast properly. I wanted it to be nice and brown and caramelized so that it could stand up to the strawberries and maintain a nice crunch. I kept tossing it occasionally, in part because tossing food in a skillet is a lot of fun. When the croutons were as done as I wanted them to be, I turned off the heat and let them cool for three or four minutes.

I added the still-warm croutons to the strawberries and tossed them well to combine. Then I dressed the salad with about two tablespoons of heavy cream and tossed it some more. (Please note that I am, apparently, one of the perhaps five or six people still alive who would write that last sentence without resorting to using scare quotes around either "dressed" or "salad." Scare quotes are evil, people: stop using them. Right now. That goes double for the grocer's plural. Were you all raised by wolves?)

I don't really know who the muse of demented cooks is, but I think I should thank her. I don't know what the appropriate expression of gratitude is, but I'm thinking that maybe I can sacrifice a small squash in her honor. She's generally pretty good to me, if you discount that time in high school when I thought that layering pancakes, chocolate chips, and American cheese would be a good idea. I wasn't sure how the strawberry salad (and let's be honest, I didn't conceive it as a strawberry salad; I came up with that name this morning; the original title of this post was "The Thing Without a Name"; I'm still thinking that "Strawberry Salad" is ridiculously precious, but whatever) would turn out, but it was delicious. The croutons were warm and both crunchy and chewy. The strawberries were cool and firm and juicy and a little bit tart. The contrast of flavors and textures was terrific.

I'm thinking that the same treatment could work with fresh peaches or with any other juicy fruit that really doesn't need to be fussed around with too much. Depending on whom I'm serving it to (and how ripe the fruit is), I might add a bit more sugar to the fruit the next time around, and I might cut the croutons a little bit smaller, because they were a bit of a mouthful (they were not, however, as overwhelming as they look in that picture; most of the strawberries were hiding in the bottom; I guess they're camera shy). And I might skip the heavy cream dressing in favor of letting the fruit macerate a little longer and producing a little more syrup and serving whipped cream as an accompaniment. But I'm talking about fairly minor tweaks. I still want the croutons to be larger than salad croutons, and I still want the fruit to be mostly firm. I don't want to lose any of the contrasts or any of the flavors.

The Grand Marnier is key here, I think. You could try substituting another liqueur (if you were making this with peaches, Chambord would probably be a better choice) or some fresh orange juice and zest, but that would be a shame. It's the combination of the liqueur and the caramel that make the croutons, and it's the warm croutons that make the dish special, so if you don't have any, you're probably better off just eating the strawberries with some cream and spreading some nice cheese on the bread. (I did the cheese and bread last night, too, but by now you should realize that where other people see "or", I generally see "and".)

Tuesday, May 16, 2006

Strawberry Short Stacks

There's no picture with this post for at least two reasons. The second reason is that I'm experiencing some, hopefully temporary, computer difficulties, so getting pictures online might be tough for a period of not less than half a day and not more than forever. But the more important reason is that I don't have a good picture of the strawberry shortcakes that I made last night. And the reason that I don't have a good picture is that I didn't take a picture of the finished product. And the reason that I didn't take a picture of the finished product is that it looked awful. And the reason that it looked awful is that last night I decided to try out my cream whipping gadget for the first time. It seemed easy enough. I put some cream and a bit of sugar and a smidge of vanilla extract in the stainless steel canister (which I'd had in the freezer for a while), then I screwed on the top and shook the cream to mix it and put a NO2 canister in the appropriate place, then I pressed the lever, and then the cream whipper projectile vomited unwhipped cream all over my shortcakes.

Perhaps I should take a look at the instructions.

Oh well. The shortcakes were delicious, though A. said that hers was difficult to eat. What she meant was that the shortcake was on the wide side, and I hadn't used a big enough plate, so there was some difficulty in keeping the pieces of strawberry from tumbling off the plate onto the chair. I did think that she would probably have found it less difficult to eat if she'd been sitting at the dining room table instead of lounging on the comfy chair in front of the television, but it seemed wiser to keep that observation to myself.

Anyway, A. and I were having a rather informal evening. V. is in Puerto Rico for a conference, and after I'd picked A. up from her mother's, we'd gone to Costco to see what looked good. A. said she'd like some Caesar salad, so I got a six-pack of Romaine. The strawberries looked pretty good, so we got the giant clamshell four-pound pack of those. I also picked up a couple of loaves of what they call their artisan bread, which they unfortunately tend to wrap before it has fully cooled, so they lose some of the crispness of the crust, but they sell it the same day they make it, and it's pretty good, especially if you toast it. Other purchases included a large wedge of Delice de Bourgogne (French triple creme cheese. So bad for you. So delicious. It exists so that you can say you're eating cheese when you're essentially eating butter. See also: St. Andre.), a quart of heavy cream (that's the size it comes in!), two dozen eggs, and two very large bags of chocolate chips (one for me because I'm out; one for A. because she makes cookies and sells them at school for spending money).

When we got home, I started on the salad and on the batter for the shortcakes. As I've probably said before, everyone has his or her own recipe for strawberry shortcake, and they're all good as long as the strawberries are good. (Last night's strawberries were not the best strawberries ever, but they were yummy. Which is a good thing since I've still got a lot of them left.) I don't have an entrenched recipe for strawberry shortcake, so I thought that I'd try a variation on the cake pancakes that I made this past weekend. That would be the next post down, so if you want to try to make what I made, you would take that recipe, and cut everything in half except for the butter, which you would reduce by a fourth. I also left out the vanilla, but I leave that up to you. Finally, I half melted the butter and I made the batter in the blender. You just kind of dump everything in the blender and turn it on. I used a scant quarter cup of batter for each pancake, but next time, I'll probably use less. I think about an eighth of a cup of batter would make just the right size.

I cut up strawberries into chunks until I had about two cups, and I sprinkled about a quarter cup of sugar (ok, Whey Low, which is also what I used for the mock Dobos torte; plain white sugar will give you the same results, but plain white sugar eaten late makes me grumpy the next day, and the Whey Low doesn't, though I could just be imagining that) and let the berries macerate while I was cooking the pancakes. I used three pancakes for each of us, and they were assembled thus: pancake, berries, pancake, berries, pancake, berries, projectile-vomited unwhipped, sweetened cream.

I can't give you my recipe for Caesar salad, either, because the dressing was unaccountably bitter, and I had to add some honey to it, and that is just wrong, wrong, wrong, though the salad was still pretty good. I have no idea how the dressing came to be bitter. It's true that I didn't taste the lemon juice after I'd squeezed it from the lemon, and it's true that I didn't taste the egg after I'd coddled it, but the olive oil wasn't bitter, and the only other ingredients I used were salt and pepper, so the bitterness makes no sense to me. Aside from the dressing (which I made as if I were making mayonnaise, which I sort of was) and the Romaine, the only other ingredients were grated Manchego (lots) and the croutons, which I made by putting a drizzle of olive oil in the pan, adding a shake of garlic powder (I know, I know, but it was all I had), cubing a few slices of the Costco bread, and cooking the bread in the skillet until it was nice and brown. Those were some tasty croutons.

You will note the absolute lack of anchovies in my Caesar salad. Caesar didn't put them there, and neither do I. Ever. I have gone on about this at some length in the past, so I'll spare you any further reprise of that particular rant.

Caesar salad and strawberry shortcake may not seem like a balanced meal, but A. was very happy with it, and she'd had plenty of protein earlier in the day. I may or may not have gone back later in the evening and toasted more slices of the bread in a bit of olive oil and garlic powder and then spread them with some of the Delice de Bourgogne, but if I did, there were no witnesses. If a man pigs out in the den and no one is there to smell the triple creme, did he really overeat? People have been pondering that question for millennia: I can hardly be expected to answer it for you today.

Sunday, May 14, 2006

Dobos Torte


Anyone who knows anything about pastry can tell you (with the full force of all that is right and true) that what appears in the picture is not a real dobos torte. I am, sadly, not enough of a food historian to tell you how much of the various information about Josef Dobos and his creation that floats around the Internet is accurate, but it would appear that "dobos" is both the name of the patissier (who, it seems, was Hungarian, but may or may not have developed the cake in Vienna) and the Hungarian word for "like a drum." Recipes differ as to the number of layers that a dobos torte should have. Joy of Cooking says nine; other sources say as few as six. Everyone seems to agree that the filling should be something very like a chocolate buttercream and that there should be a layer of hard caramel glaze on the top.

I didn't originally intend to make a dobos torte per se. I was more interested in coming up with an (arguably) easier way to make the cake part, and once I had my seven to ten layers, I was hoping to make a batch of orange curd and a batch of raspberry curd and then alternate them as fillings between the layers. To finish, I wanted to pour ganache over all.

But all that filling seemed like a lot of fuss, and I wasn't sure I was going to make the cake at all until a very rainy afternoon and a very eager (and bored) L. combined to make me promise that we'd make something fun. By the time I made that promise, we were at home, and going back to the supermarket wasn't an option, and there were neither oranges on the counter nor raspberries in the freezer. There was some cream in the frig, and there's always some chocolate in the pantry, though, so I figured I'd make do somehow. When you're cooking with a ten-year-old, you don't have to make the ideal cake that you had in your head, but you do have to end up with something.

The hardest part of making a dobos torte (or an eight-layer cake filled alternately with orange and raspberry curds and topped with ganache) is making the layers. The typical way to make the layers is to either use a whole lot of pans or to use half a whole lot of pans and split the layers. (Alternately, you can make two half-sheet pans of cake and cut them in rectangles and stack those up, but when was the last time you saw someone playing a rectangular drum?) Splitting a cake into layers that are perhaps a third or a fourth of an inch thick is not for the faint of heart, the strong of heart, or the completely heartless. (I don't know how anyone does it. I once made a nine-layer cake with genoise and chocolate buttercream, and I have no idea how I did it. I think I did some splitting of layers, but I'm not sure how much, and I really can't be certain that I split any.) Baking six to ten separate layers is easier, but it is still quite the production.

It occurred to me that it might be easier just to do it with pancakes. But I wanted the pancakes to be cakelike. I didn't want either your typical American flapjack, nor your typical European crêpe. I wanted something in between the two in thickness. And I wanted it to taste like cake. I thought about taking a cake recipe and a crêpe recipe and splitting the difference, but instead I just took a long look at the Joy of Cooking white cake recipe and made what seemed to be suitable adjustments. Starting with using whole eggs rather than just beaten egg whites, so that it really couldn't be called a white cake, but whatever. I used less flour; I used more milk. I wanted some orange flavoring, so I added some Grand Marnier. It seemed like it ought to work. And it did.

My recipe made nine layers. If you count the layers in the picture, you'll only see eight. With the amount of cream I had, I could only make about a cup of ganache, and even though I thought I was relatively frugal by using only about two tablespoons between each layer, I ran out after the seventh layer of filling, so I let L. take the ninth layer of cake and eat it with whatever bits of ganache she could scrape out of the big measuring cup with the bits of cake. She was very happy with it. She was also very happy with the finished product.

Cake Pancakes

8 ounces cake flour
1.25 cups sugar
2 t. baking powder
(a pinch of salt, if you're using unsalted butter)
1/2 cup butter AT ROOM TEMPERATURE
2 eggs
1 t. vanilla extract
2 T. orange liqueur
1 1/3 c. milk

Put the cake flour, sugar, and baking powder (and the salt, if you're using it) in the bowl of your stand mixer. Fit the whisk attachment to the mixer and mix for a couple of minutes.

With the mixer running, add the softened butter. Mix until well incorporated. With the mixer still running, add the eggs (one at a time), the vanilla, the orange liqueur, and the milk. Do not rush adding anything, and don't move on to the next ingredient until the last is well incorporated. Scrape the bowl down if you feel it would help. You want the finished batter to be very smooth and slightly more liquid than normal (American) pancake batter.

Put a nonstick skillet over a medium low flame. When it is hot, add a half teaspoon or so of butter, swirl the butter around, and rub it off with a paper towel. Fill a half-cup measure with batter. Hold it over the middle of the pan, a few inches away from the pan, and pour the batter onto the pan in a slow stream. It should spread into a round nearly as big as your skillet (unless your skillet is very large). Cook until the edges appear somewhat dry and there are large bubbles all over the surface of the pancake. Carefully slide a pancake turner under one edge of the pancake, lift the pancake off the pan, and flip it.

Cook the pancake on the other side for just a minute or so. It will take much less time than the first side took. Invert a cooling rack on top of the pan, flip the pan over, and when the pancake falls onto the rack, take the rack over to the counter to let the pancake cool. Add another small amount of butter to the pan, wipe it out with a paper towel, and make the next pancake. Repeat until they're all cooked.


Flipping a cake pancake is significantly trickier than flipping a flapjack, but it is still a good deal easier than it seems when you first do it. It will seem like it's going to break, and it may, in fact, crack a little, but it will repair itself when the second side cooks. Once you have your pancake turner under the edge far enough to lift the pancake, the whole pancake will follow. Then you just put the dangling side down farthest away from you and finish flipping it. After you've done the second one, it will cease to seem difficult. The pancakes will shrink a bit when they're cooking on side two. Don't let this bother you. Also don't be troubled if the pancakes are not exactly the same size. After you stack them up, you're going to cut them in slices to serve anyway, and the cross section is very impressive even if the rim is not perfectly even. And if the unevenness bothers you, you can always either trim the layers with a large circular template or flan ring or just ice around the sides with some buttercream.

The pancakes turned out very well. The cake itself was a little less good than it might have been because I had an impatient (but very helpful; you should have seen her spreading the ganache on the layers) ten-year-old who wanted to eat cake. And because I don't have enough racks to properly cool nine layers without some overlap. Layers this thin cool fairly quickly, and when you stack them they don't stick, but they would have been even better if they had been left to cool separately and for longer.

Because we ran out of ganache (you can look up one of my earlier ganache recipes; you can also fill the cake with anything you like) after the seventh layer of filling, I microwaved some seedless raspberry jam and brushed a couple of tablespoons of it on the top layer. Then I grated some bittersweet on top of it, while the jam was still warm.

It does take a while to cook nine layers on top of the stove. You could, of course, do it in half the time with two skillets, but it's not particularly taxing work, and you can do something like unload or load the dishwasher or otherwise clean up after yourself while you're waiting for the first side of the pancake to cook. I rather liked cooking the layers that way. L. watched TV while I was cooking the layers, but whenever there was a commercial, she had fun watching me deal with the pancakes. And of course when we got to the filling, she was both fascinated and involved.

I'm definitely going to try this method again. I may add a bit more butter to the batter, and I will likely get some more cooling racks, but I certainly found it more fun than baking nine layers of cake. And I thought the finished product was very good indeed. L. concurred.

Thursday, May 11, 2006

Try, Try Again


The initial title for this post was "More Than One Way To Skin a Cat," but it will not surprise regular readers to learn that when I thought about that title, I began to wonder whether it was really true. My experience with cat skinning is extremely limited (full disclosure: I am more of a dog person than a cat person, but I like them both, and why do I feel like I've typed these very words before on this very blog of all places?), but it seemed likely to me that the cat-skinning industry had come up with the most efficient method, so that there might really be only way. Or, I said to myself, there might really not be any good way at all, and if I put "How to skin a cat" into Google, I might not get any hits at all.

This, reader, is an exercise you do not want to do for yourself. While you might be favorably impressed by the sheer magnitude of thought that has been put into the question of how to skin a cat and the trouble that has been taken to post some of that thought on the Internet, the actual information you will find is generally not edifying. (I will admit to being mildly intrigued at stumbling across the Husker Du song with that name, but only because I had a college roommate who was very fond of Husker Du, and he would have liked it a lot. We must hope that his tastes have since matured.)

Anyway, despite the number of eyes that have been rolling in the anapestic household, I have not been able to set aside the notion of recreating the flatbread that I spoke of in my most recent post. It has been on my mind to one degree or another for much of the past week. I had decided that there was something fundamentally flawed with the approach that I had been taking, but an alternative did not occur to me until this morning when it occurred to me that the texture of the Pazo flatbread was similar (though not identical) to the texture of my thin biscotti. I reasoned that perhaps if I adjusted my basic biscotti recipe, I could either come up with a base for the flatbread or come up with a suitable substitute for the whole flatbread.

Because the Pazo flatbread comes in rectangles about the size of half a graham cracker, I had originally tried to make it in a big sheet and then cut it up. And when I first thought about making biscotti, I wondered whether I could form the biscotti dough into rectangular solids for the first baking and then slice the solids horizontally to make relatively large sheets from which to cut the individual crackers. I eventually abandoned this idea as impracticable, reasoning that while the traditional biscotti shape is not exactly the same as the piece that I was inspired by, the shape is somewhat malleable, and a cracker that was basically an oval would still taste as good.

Because of the difficulty of coating individual thin biscotti with caramel and adding the sunflower seeds, I decided to work the sunflower seeds directly into the dough and hope that the result was close enough. The Pazo flatbread, after all, is only mildly sweet, and I have been working at keeping my sugar consumption down lately.

I wanted something darker this time around, and while I knew that using the darker whole wheat flour would get me part of the way there, I would need something else to intensify the darkness. I thought of using dark corn syrup or molasses, but the biscotti dough tends to be sufficiently sticky without any additional help, so I decided to add some prunes.

I have found, reader, that there are moments when it is wise not to inquire too closely into the way my fevered brain works. This seemed to be one of those moments, and I decided to trust my instincts.

The resulting baked goods (I still have no title) are certainly not the same as the Pazo flatbread/cracker, but I am nonetheless uncommonly pleased with them. They are crunchy, substantial, flavorful, and mildly sweet. They are also loaded with sunflowery goodness. They would, I believe, make an excellent accompaniment to coffee or tea, into which they could be dunked, or not, depending on how you're feeling at the moment. They will probably not stop me from trying to figure out exactly what it is that they serve at Pazo, but they will keep me, for the moment, from trying other approaches.

Baked Goods

1/2 cup sugar
6 prunes
2 cups whole wheat flour
pinch salt
3/4 t. baking soda
3 eggs
1.5 cups roasted, unsalted sunflower seeds
Water

Preheat oven to 340 degrees. Either line a baking sheet with a Silpat or parchment paper, or grease and flour it.

Combine the sugar and prunes in the food processor and process until the prunes are finely ground. Put the sugar and prunes into the bowl of your Kitchenaid and add flour, salt, and baking soda. Turn the mixer on low and add the eggs, one at a time. When they are well integrated, and with the mixer still running, add the sunflower seeds. If the mixture does not gather itself into a dough, add water, a tablespoon or less at a time, until it does.

Divide the dough into halves and shape each half into a log about fourteen inches long by two inches wide. Put the logs on the prepared baking pan, leaving at least three inches between them.

Bake for about forty minutes. Remove the logs from the oven and let cool for twenty minutes (or longer). Make a slice through each log, at about a forty-five degree angle. Then slice each log thinly, on the same angle. Lay the slices flat on two cookie sheets and return to the oven for about another twenty minutes, or until they are as crisp as you like them. Let cool completely before storing.


Because of the whole wheat flour, this dough requires significantly more moisture than my standard biscotti recipe requires. In that recipe, three large eggs usually provide plenty of moisture to make a slightly sticky dough. In this case, I used three extra large eggs, and the resulting mixture was nowhere near wet enough to be called dough. When you start adding the water, however, proceed with caution. It will seem much too dry and then very suddenly it will seem too wet. It takes a little while for the water to work itself throughout the dough, so wait between additions, or you will end up with a mess. You want the dough to be at least a little bit sticky, however. You can't really roll this dough into logs the same way you can with ordinary biscotti. You just have to do the best you can with your hands and then form it the rest of the way directly on the Silpat/parchment/prepared baking sheet. It is a good thing for you to get your hands messy in the kitchen, from time to time. Before the dough goes into the oven for the first time, it is rather unattractive. Do not be deceived by appearances.

I use my V-slicer to slice the biscotti. It does a pretty good job of making slices that are between 1/3-inch and 1/4-inch thick. There will always be some crumbling, but you can just eat the bits that don't make it into nice slices. They will be yummy.

Determining exactly how long to keep the logs in the oven for the first baking is always the hardest part. If they are too underbaked, the slicer will not work well on them, and if they're overbaked, they will just crumble entirely when you go to slice them. When they're ready to leave the oven after the first baking, the logs should keep their structural integrity when you pick them up from the baking pan, but they should not be too tough. This will be easier if you make your logs relatively high and narrow.

You can, of course, cut these by hand (or with an electric knife or an electric slicer). If you're going to cut them much thicker, then I think you may want to consider them more of a cookie and add a little more sweetener. I was very pleased with the way mine turned out, but I might swap out a bit of the sugar for a tablespoon of honey or molasses next time.

In the interest of full disclosure, I should mention that I used Whey Low instead of table sugar when I made these. I have never been able to tell the difference between Whey Low and white sugar in baked goods, so I went with the Whey Low because of its claims to be easier on your blood sugar and waistline than ordinary table sugar. I am slightly skeptical about these claims, but people I know who have looked into the matter more thoroughly than I have and who have a healthy respect for the scientific method believe that there is something to them. You can go here and see for yourself. (I receive no benefit if you follow that link and decide to order something.) You can use ordinary white sugar in the recipe, and I'm sure you'll get the same results. I think brown sugar would also work just fine.

Tuesday, May 09, 2006

A Work in Process


Behold my latest obsession. I have no idea what to call it. If I knew its name, then I'd have at least a hope of finding a recipe for it. Last weekend, at the very beginning of a wonderful dinner in Pazo, a Baltimore tapas restaurant (I did not write in detail about the dinner because it would have exposed my monstrous hypocrisy. In these very pages not long ago, I whinged about spending $100 for three of us to eat at the local Belgian bistro on their prix fixe night. When we ate at Pazo, there were also three diners, and we spent nearly $150, and I didn't mind at all. I could claim that this discrepancy of reaction was due to Pazo's vastly superior interior, and there would perhaps be some validity to that claim. When you're sitting on an upper level interior balcony and you can look down on a busy dining room and a very busy kitchen and you can see a whole legion of chefs working hard on the fifteen or so tiny dishes you've ordered, then you really feel like you're getting your money's worth. Also, the wine was really good and not very expensive. But the sad fact is that I didn't mind because someone else was picking up the tab. I'm a bad man. But, you know, I'm okay with that.) the server brought to the table a small container of something that seemed to be a cross between crackers and flatbread. It was very dark, slightly sweet, and it was topped with a dense layer of sunflower seeds, which appeared to be held on by a very thin layer of light brown caramel. Absolutely delicious and like nothing else I'd ever had before. The rest of the meal was also swell, but it's the flatbread that has come to haunt me.

I suppose that the sensible thing to do would have been to ask the server what the stuff was called. The server was extremely knowledgeable about the menu, and when I asked her what the deal was with the "rustic bread of purgatory" (that's the English translation) she told us that it was a simple wheat bread but that mothers used to tell their children that for every crumb they wasted, they'd spend a year in purgatory. Serve them right, too. Or at least I presume that it would have. I didn't order the purgatory bread, opting instead for the rosemary fougasse, which was yum, yum, yummy. I'm pretty sure I could find a recipe for that, somewhere. Alas.

Anyway, the sunflower seed-studded flatbread/cracker (hereinafter ss-sf/c) was hard and crisp without being either tough or crumbly. It was about as dark as that cocktail pumpernickel bread that comes in long square loaves, but each piece was only about an eighth of an inch thick.

I've made flatbreads before, with varying degrees of success. You can make an unleavened flatbread by making what's essentially a pasta dough (with some extra ingredients, usually) and baking it. You can even roll it out in a pasta machine (assuming, of course, that your pasta machine hasn't been devoured by the Cellar of Doom, which appears to have eaten much of my cookware, not that I'm bitter, of course). You get a bread with a lot of substance that way. You probably wouldn't want to give up your traditional yeast breads for that sort of flatbread, but you can certainly make something edible, and possibly even good, in that manner. So when I tasted the ss-sf/c, I figured that I'd make a batch of dark flatbread, brush on a little bit of butter or oil mixed with molasses or honey, sprinkle on some sugar, add some sunflower seeds, and put it in the oven. While baking, it would rise very slightly, the sugar would caramelize, the sunflower seeds would brown, and the whole thing would be crunchy and delicious. Surely something that I could get on the first try, right?

Not so much.

I think my first batch started with a cup of whole wheat (King Arthur White Whole Wheat; it's what I had around) flour, two tablespoons of canola oil, a tablespoon of honey, a pinch of salt, and enough water to make a rollable dough. I rolled it into a thin circle (maybe ten inches in diameter), brushed it with some butter, sprinkled on a couple teaspoons of sugar and a few tablespoons of roasted sunflower seeds, and baked it at 375 for twenty minutes or so. The dough didn't rise at all (I don't know why I thought it would; I didn't add anything that would cause it to rise, and I didn't do anything to work any air into it), the flatbread wasn't half dark enough, the sugar didn't caramelize, the sunflower seeds didn't stick. It wasn't awful per se, but a slightly sweet, decidedly tough cracker with sunflower seeds falling off it wasn't what I'd had in mind.

Before my second attempt, I tried to do some research, but I didn't find any comparable recipes. I pulled out Beat This, one of my favorite cookbooks, because I remembered that Ann Hodgman wanted me to make my own giant graham crackers so that I could crumble them up to make a cheesecake crust, and while a graham cracker wasn't what I wanted, I at least got an idea of how much baking powder might produce a more crackery texture. The second trial had butter in place of oil, slightly more honey (I didn't measure this time, but I was generous with the squeeze, I think), and a quarter teaspoon of baking powder. This time, I baked the cracker without any topping on it, then when it came out of the oven, I brushed it with a mixture of melted butter and honey, then sprinkled it with some sugar, and put it under the broiler to caramelize. And it sort of caramelized, but I clearly hadn't used enough sugar, and by the time I got it out of the oven and put the sunflower seeds on, the caramel, such as it was, was no longer sticky.

Before attempt #3 (the results of which you see above), I decided that I needed to start with a darker dough and use a slower (probably 325) oven to get more even browning. I decided to use molasses instead of honey. I also decided to increase the proportion of butter slightly, so I went from 1 cup of flour and 2 T. of butter to 1.5 cups of flour and 4 T. of butter. I didn't actually use molasses, though, because when I went to the store to buy some, there wasn't any on the shelf.

I beg your pardon?

That's right, I'm talking to you, Giant. I live in Olney, Maryland. I realize that this is not exactly a happening place, but it's an affluent suburb. How does anyone in such a place stop carrying molasses? I can get twelve kinds of mustard, but there's no molasses. Giant is now carrying maple syrup in several different grades in multiple sizes, but they don't have a foot of shelf space for molasses? Is this some sort of sick joke?

Anyway, I got some dark corn syrup, a substance for which I have never before had any use, and for which I still don't have any use because it didn't really seem to have all that much more flavor than light corn syrup, which, we all know, is a tool of the devil. The dark corn syrup really didn't make the dough all that dark, so in future, in addition to using molasses, I'm going to use a darker flour.

But back to attempt #3. I was tired of monkeying around with various failed ways to stick my sunflower seeds to the dough, so I decided to bake the dough, cover the baked dough with a thin layer of caramel, and sprinkle the seeds on the caramel. Caramel is nothing if not sticky.

Attempt #3 was a big improvement over its forebears, but it was still nothing like the ss-sf/c that I had at Pazo. I didn't, however, feel moved to throw this particular batch away. Instead, I broke it into pieces and munched on it over the next couple of days, during which its flavor improved somewhat. The problems with attempt #3 (in addition to the dough not being dark enough) indicate that I should substitute another fat for the butter; increase the fat content a bit more; use roasted, unsalted sunflower seeds (the ones I used were raw, and even though they were tossed onto hot caramel and returned to the oven for several minutes, they still tasted raw); make a slightly lighter caramel; and improve my skills in working with caramel. I needed to be significantly faster. I was only moments away from losing the caramel's tackiness, though a substantial majority of the seeds did stick, and my layer of caramel was too thick. The ss-sf/c seemed like it was all of a piece, even though you could make out the caramel. Attempt #3 seemed decidedly layered.

I have not had a lot of experience with caramel in the past, but lack of experience is not the sort of thing that makes me do something sensible like look in a cookbook for a recipe. But while my skills at handling caramel may not be everything they ought, the caramel itself was very good. Here's how I made it

Caramel

1 T. butter
1/2 cup sugar
1 T. light corn syrup (oh stop looking at me that way; I don't even believe in the devil)
2 T. heavy cream

Put a six-inch cast iron skillet on a medium to medium-low flame. Add the butter. When the butter has melted, stir in the sugar and the corn syrup, with a wooden spoon. Continue stirring until the butter melts. Continue cooking until it turns the color of caramel. When you begin to see a trails of darker brown caramel in the wake of the spoon, turn off the heat.

Taking care to avoid getting burned, pour in the cream. There will be a great deal of spattering. Stir the caramel and use immediately.


I did not actually measure either the devil syrup or the heavy cream. I think that 1 tablespoon is a fairly accurate representation of the amount of syrup, however. I added the syrup because Alton Brown (or, more accurately, Alton Brown's food chemist) says that having a small amount of a second kind of sugar inhibits crystallization. Or something. I just poured the cream directly from the carton, so the amount there is a guess.

Have I mentioned how much I love my cute little cast iron skillet? It's really perfect for making a small batch of caramel, and I intend to play around with the process some more. There is something that is just kind of kick ass about making caramel without using water. I think that by adding significantly more cream, I can end up with something more like a thick caramel sauce. The caramel I made this weekend hardened admirably. I spread it as thinly as I could across the flatbread, but it was still thicker than I wanted. I think that by more carefully coordinating the various elements of the recipe and by procuring a large offset spatula and keeping it very hot, I can get a thinner layer of caramel and keep it sticky long enough to get my seeds down.

Because I'm not giving up on this ss-sf/c. One way or another, I'm going to get the result I want (by the way, if you have any idea what this stuff is called or any idea how to make it or where to find a recipe, I'd sure appreciate it if you'd pass that information along to me) and then serve it to my amazed guests. They'll ask me where I bought such a treat, and I'll say that I made them myself and that it was really no big deal.

Sunday, May 07, 2006

Oatmeal Egg Baby


This isn't my recipe, of course. I stole it, remorselessly, from Shuna at eggbeater. I have been wanting to make it ever since I read the entry about it, and this past Saturday, I felt the need to make something relatively easy and not of my own devising. I have spent a good deal of my kitchen time over the past week trying, without much success (so far), to develop a recipe, and I'll probably write about that continuing attempt within the next few days. My lack of success has left me feeling a bit frazzled, and this recipe seemed like just the thing.

Anyway, Shuna said that her Egg Babies (I am not quite clear on how the pluralization works here and when "babies" is more appropriate than "baby," so bear with me, ok?) recipe was almost infinitely adaptable, and I decided to test its limits. Or so I thought. The result was sufficiently puffy and fully delicious, so I reckon that if I really wanted to test the recipe's limits, I'd have to come up with some truly radical ingredients and/or proportions.

I wanted something with at least some fiber, so instead of flour, I used rolled oats, and I added sunflower seeds, which I currently have in abundance. I substituted almond milk for the regular milk. I don't know why. I don't have an 8-inch cast iron skillet (alas), so I used my trusted 6-inch skillet and halved the recipe. It would probably serve two people, but I liked the first half so much that I went back and ate the rest of it myself.

Oatmeal Egg Baby

1 cup rolled oats
1 T. sugar
pinch salt
1/4 t. ground cinnamon
3/4 cup almond milk
2 eggs
2 T. butter, melted
2 T. roasted sunflower seeds
1 T. butter, not melted

A lemon
Sweetener of choice

Put a six-inch cast iron skillet into the oven and preheat the oven to 400 degrees.

Combine the oats, sugar, salt, and cinnamon in a bowl. Beat the eggs and milk together with a fork or whisk until well blended. Pour the egg mixture into the dry ingredients and stir to combine. Add the melted butter and stir again. Not too much stirring, please.

Remove the hot pan from the oven and add the last tablespoon of butter. Swirl around to coat the pan.

Quickly stir the sunflower seeds into the batter, then scrape the batter into the hot skillet. Put it back in the oven for 25 minutes or until puffed and well browned around the sides. Remove from oven, cut into half (or quarters if you prefer). Serve with the lemon and sweetener(s).


You really don't want to omit the last step of lemon and sugar (or whatever) here. I ate the first half of my egg baby with some raspberry jam on the side, and it was a little bit lackluster (it tasted healthy; if I were making it for guests, I would have added more sugar, I think). So I squeezed half a lemon over the second half and then added some Splenda (Don't judge me! Just use powdered sugar or honey instead.), and the result was terrific. I think that the lemon is especially good, but you could probably go with any flavor of syrup and also end up with something delicious.

Shuna's rose a lot higher than mine. I believe the difference in height is attributable to my substitution of oatmeal for flour (a cup of rolled oats weighs a good deal less than a cup of flour). The batter was so loose when I had mixed it that I almost added half a cup of flour to it, but I decided that I'd just go with what I had, and I'm glad that I did. The oatmeal-based baby did rise, and it was plenty light; it just didn't have that souffle-like mega-rise that you would get with a somewhat thicker batter.

You don't have to put the skillet in the oven when the oven's cold. I just figured that it would save time to do that rather than to wait until the oven was hot.

Monday, May 01, 2006

Summer Berry Tart


You are, no doubt, rolling your eyes and asking yourself what is up with me and my titles. There is, you are saying, not one word of "Summer Berry Tart" that is in accord with the picture I have posted. It is not summer, there are no berries, and the dessert is clearly made in a pie pan.

And while your objections, dear readers, are beyond reproach, the title is my story, and I'm sticking to it. The recipe I'm giving today really is (sauf les poires) my summer berry tart recipe. There are, sadly, no summer berries yet available, but this is the tart that I make when I have been fortunate enough to locate a patch of (increasingly rare) wineberries or blackberries and have managed to gather a pint of fine specimens. And I really do prefer to make this recipe in a wide, shallow tart pan to maximize the impact of the berries, but to do so would have required a trip down into the Basement of Despond, where I would have had to wallow through boxes of equipment with no guarantee of success. (Really, organizing the house, including the basement, is on our spring to do list. If not this spring, then definitely sometime this decade.) And since there were no berries, maximizing their impact seemed, at best, unlikely, so I went with the pie plate.

When you have summer berries, this tart requires very little effort indeed. You do have to make the tart shell, but you could easily make a crumb shell, which is very simple. You could, I suppose, buy a graham cracker pie crust from the supermarket, and you'd have something very good, but it would look a whole lot like a no-bake cheesecake from a box, and something as glorious as a fresh blackberry that you've wandered into the thorns to collect really deserves a better supporting cast than that.

Anyway, when it's summer, you make the tart shell the evening before, make the filling, put the filling in the shell, top with berries, and there it is. Simple, elegant, and delicious. Sublime, even.

You can still get to sublime in the springtime, but you have to work a little harder for it. I decided to go with pears mostly because on Saturday evening, before the opera, we ate at a really good tapas restaurant, and we had two dishes that included pears cut in thick matchsticks (I believe the correct term is "bâtonnet", but they may have been even a shade thicker than that), and I was intrigued by the pears cut in that shape.

I will give you my pastry recipe, but I want you to do a better job with your pastry than I did with mine. This recipe is really the sort of thing that a good food processor should do better than you can do by hand, but my good food processor has been stored in the basement in an attempt to ensure domestic tranquility, and V.'s food processor was not up to handling a two-crust recipe (even when I'm only making a single crust, I have trouble not making a double-crust recipe; how hard is it to find a use for pastry dough?), and I had to process the flour and butter for a very long time, and then when I added the ice water, there wasn't room for a ball to form, and I had to dump the whole mess out onto my pastry marble and knead the extra ice water in by hand. So the butter was over blended, and even though I let the dough rest overnight, the final result was very tough, albeit tasty. It is also possible that I cooked it for too long at a low temperature, but when you have a lot of butter and sugar in a dough, you start to worry about burning.

Sweet Tart Dough

1/2 cup sugar
grated zest of one lemon
3 cups all purpose flour
2 sticks butter, cut into tablespoons
pinch of salt (unless you used salted butter)
Ice water.


Put the sugar and zest in the bowl of your food processor and process until the both are fine.

Combine the sugar and flour (and salt, if you're using it). Cut the butter into the flour using whatever method makes the most sense to you.

Add about four tablespoons of water and either process or mix gently with a fork until a ball forms. If a ball doesn't form, add more water until one does. Knead the dough very briefly to make the entire mass cohere. Divide into two pieces, form each piece into a disk, wrap each disk in plastic wrap and refrigerate for at least an hour.

Remove a disk of dough from the refrigerator and beat it lightly with your rolling pin to get it moving. Unwrap it, flour it lightly, and roll it out on a lightly floured marble. If a split develops, just push the pieces around the split together and keep rolling.


If you're going to use this dough for an unbaked tart, you'll need to bake it blind. Preheat your oven to 350 degrees. Put the rolled pastry in your tart pan and perhaps double the thickness around the rim. Trim off the excess. Line the pastry with aluminum foil, fill with whatever you use as pie weights (I used dried chick peas), and bake for twenty minutes at 350. Remove the foil and weights, reduce the heat to 325, and bake until it's the shade of brown that you prefer. Watch carefully towards the end: all-butter crusts burn easily. Remove from the oven and let cool completely before filling.

Springtime Summer Berry Tart with Pears in the Place of Berries

A pre-baked 10" tart shell or 9" pie shell.

Two large pears
1 t. lemon juice
1/3 cup sugar
1/8 t. cinnamon
1 T. butter

8 ounces cream cheese
2/3 cup sugar
1/4 cup fresh lemon juice
1 cup heavy whipping cream

These may look like French fries, but they're not.  They're pears!Wash your pears and remove any parts of the peel that are blemished. Cut the lobes off your pears with four cuts, leaving a long, square core section. Cut the pear lobes into bâtonnets. Toss the pear sticks with the lemon juice. Combine the sugar and cinnamon, and toss the mixture with the pears. In a nonstick skillet, melt the butter over low heat. Turn the heat to medium, add the pears, and cook for four or five minutes until the syrup given off by the pears is thick and bubbling but not caramelized (I cooked mine about two minutes more after I took this picture). The pear sticks should be somewhat softened, but should still have a little bit of bite to them. Remove the pears from the heat, put them in a strainer. Reserve the syrup, and put the pear sticks in the refigerator to cool.

Cream the cream cheese and sugar together until they are well combined and fluffy. Add the lemon juice and three tablespoons of the reserved pear syrup, and mix until well combined. There should be no lumps and the sugar should be fully dissolved.

Beat the cream until stiff. Fold the whipped cream into the cream cheese mixture. Turn the resulting mixture into your tart shell.

Arrange the cooled pear sticks on top of the tart. Refrigerate for at least half an hour before serving.


This is the sort of filling that really wants to be kept cold. When you make this filling for the summer berry tart, you don't add the pear syrup, so it's a bit more solid. With the pear syrup, it is very soft (and very, very good; though it is also thoroughly delicious with just the lemon juice), and even when you keep it cold, it will only barely hold its shape when you cut the tart. You can refrigerate the components at any step in the process. When I make this, I use the same Kitchenaid bowl for both the cream cheese and the whipped cream, so I start out by putting my whisk attachment in the freezer. I use the paddle attachment on the cream cheese, then scrape the cream cheese mixture into a bowl and refrigerate, wash the mixer bowl, swirl cold water and ice cubes around the mixer bowl, dry it, and beat the cream. Then I fold the cream into the cream cheese and refrigerate again while I do something else.

Whipped cream, by itself, tends to separate, so in a perfect world, you would make this tart when you had enough guests to finish it the same day it was made. On the other hand, I made the tart yesterday evening, and V. and I each had a piece, and when I took it out of the refrigerator (it needs to be in the refrigerator whenever you're not assembling it or cutting a piece out of it; did I mention keeping it cold?) this morning and cut another small piece, it was every bit as good as it was last night (which, I must reiterate, was fab-u-lous), so I reckon it's good for a couple of days, though since A.'s coming over this evening and V.'s home all day today, the chances of it surviving until tomorrow are remote [update: the tart was every bit as good twenty-four hours after completion as it was just after completion; now it's gone].

You will, naturally, want to arrange your pears more decoratively than I have. I should really look into a food stylist institute, though from what I've read about food stylists, what they do to make food look good for the camera often renders it inedible, and I'm not having any of that. You can also substitute any fruit you like for the pears, though the pears were awfully good prepared this way. If you prepare the recipe with the pears, you will find that you have significantly more than the three tablespoons of syrup that you need for the filling. I disposed of my excess syrup with hunks of plain Italian bread, which I ate greedily. Yum.